
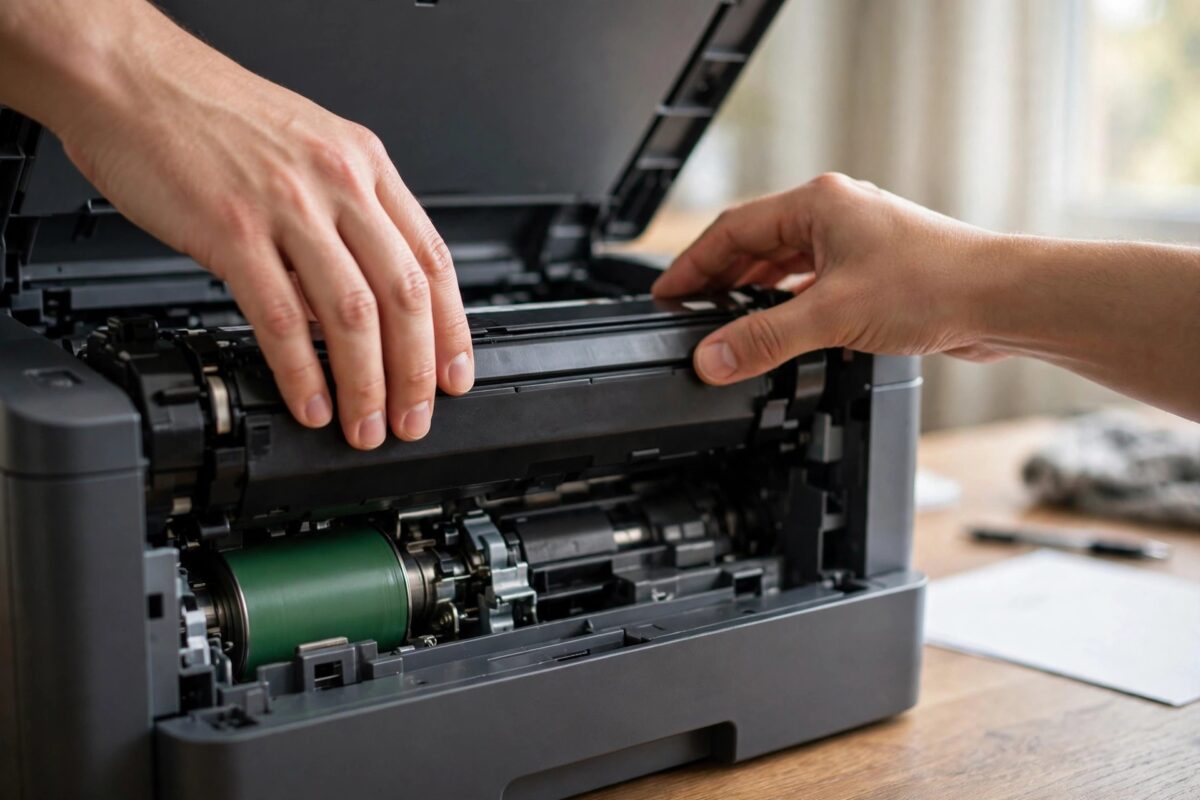
You have just fitted a brand new toner cartridge, closed the cover, and expected your Brother printer to start working again. Instead, the screen still shows “Replace Toner” and the printer refuses to print. This is one of the most common Brother printer problems, and in most cases the cartridge itself is fine.
The message stays because the printer did not detect the new cartridge correctly, or because its internal toner counter was never reset. The good news is that you can usually clear it in a few minutes without tools and without calling for service.
Quick Answer
Remove the toner and drum unit, slide the green tab to clean the corona wire, and reseat the cartridge firmly until it clicks. Then reset the toner counter through the front panel menu or the toner reset sequence for your model. If the message remains, clean the cartridge contacts and check that the cartridge is a correct, compatible model with its protective seals fully removed.
Why the Replace Toner Message Stays On
Brother printers do not measure toner like a fuel gauge in a car. Instead, they estimate toner use by counting pages and drum rotations. When the count reaches a set limit, the printer shows the Replace Toner warning, even if a little toner is still left inside.
When you fit a new cartridge, a small flag gear or sensor on the cartridge should tell the printer that a fresh cartridge has been installed. If that signal is missed, the old count stays in memory and the warning does not clear.
Common Causes
- The cartridge was not pushed in far enough and did not click into place.
- The protective tape, paper, or plastic cover was left on the cartridge.
- The toner flag gear did not reset because the cover was closed too quickly.
- The metal contacts on the cartridge or inside the printer are dirty.
- The cartridge is a starter, low-yield, or incompatible third-party model the printer cannot recognise.
- The drum unit is worn and is confusing the toner detection system.
Understanding the cause helps you avoid repeating the same steps. Work through the fixes below in order, from the simplest reseat to a full manual reset.
Step 1: Reseat the Toner Cartridge Properly
Many Replace Toner errors are simply a seating problem. A cartridge that is even slightly loose will not trigger the reset sensor.
- Turn the printer on and open the front cover.
- Pull out the drum unit and toner cartridge assembly using the handle.
- Push down the green lock lever and lift the toner cartridge out of the drum unit.
- Check the cartridge for any tape, paper strips, or orange protective covers and remove them if present.
- Rock the cartridge gently from side to side five or six times to spread the toner evenly inside.
- Place the cartridge back into the drum unit until you hear a clear click.
- Slide the green tab on the drum unit from left to right and back several times to clean the corona wire, then return it to its home position marked by the small triangle.
- Slide the whole assembly back into the printer firmly and close the front cover.
Wait for the printer to warm up. In many cases the message clears at this point because the printer has now detected the cartridge correctly.
Step 2: Reset the Toner Counter Manually
If reseating does not clear the message, the toner counter needs a manual reset. The exact buttons differ by model family, but the general method for many monochrome laser models is similar.
For Models With a Toner Reset Menu
- Make sure the printer is turned on and the front cover is open.
- Press and hold the Secure and X Cancel buttons at the same time, or press the toner reset option shown on the display, depending on your model.
- Use the arrow keys to select the toner type you installed, for example Standard or High Capacity.
- Press OK to confirm the reset.
- Close the front cover and wait for the Ready light or Ready message.
For Models With an LCD Menu
- Press Menu or Settings on the control panel.
- Go to General Setup, then Replace Toner.
- Select Continue if you want to keep printing, or complete the reset steps shown for your model.
- Press OK and then Stop or Exit to return to the home screen.
Some colour models use a different sequence through the touchscreen. Always check the exact steps for your model on the official Brother support and downloads page before trying random button combinations found on forums, because the wrong sequence can change other settings.
Step 3: Clean Contacts and Check the Drum
If the reset works for one print job and then the message returns, dirty contacts or a worn drum are likely causes.
- Turn the printer off and unplug it from the wall.
- Remove the drum and toner assembly again.
- Wipe the metal contacts on the side of the toner cartridge with a dry, lint-free cloth.
- Wipe the matching contacts inside the printer in the same gentle way. Do not use water or cleaning spray.
- Look at the drum surface. Do not touch it with your fingers and do not expose it to bright light for long.
- If you see heavy scratches, grey patches, or toner build-up that does not clear after cleaning the corona wire, the drum may need replacing.
- Reinstall everything, plug the printer back in, and turn it on.
Our guide to cleaning and replacing a Brother drum unit correctly explains how to handle the drum safely and how to tell normal wear from real damage.
Step 4: Check Cartridge Compatibility
Not every cartridge that fits will work correctly. Brother printers are designed for specific cartridge codes, such as TN-2420, TN-247, or TN-760, depending on the region and model.
Open the printer’s product page or your user guide and confirm three things. First, the cartridge code matches your printer model exactly. Second, the cartridge is the right type for the reset you performed, standard or high capacity. Third, if you use a compatible third-party cartridge, confirm it has a reset gear or chip. Some very cheap cartridges lack this part, so the printer can never detect them as new.
If you still have the old cartridge, try fitting it again briefly. If the message changes or clears with the old cartridge, the new cartridge is faulty. If the same message stays with both, the printer sensor or drum is more likely at fault.
Common Mistakes to Avoid
- Forcing Continue mode forever: Continue mode lets you print past the warning, but print quality will fade. Use it only as a short test, not as a permanent fix.
- Shaking the cartridge hard: Gentle rocking spreads toner. Hard shaking can spill toner inside the printer and create a bigger mess.
- Resetting for the wrong capacity: If you reset a standard cartridge as high capacity, page counts and warnings will be wrong later.
- Touching the drum or chip: Finger grease can damage the drum surface and stop the chip from being read.
- Ignoring firmware prompts mid-fix: Do not update firmware in the middle of troubleshooting unless the support instructions tell you to.
- Closing the cover before the click: Always listen for the click that confirms the cartridge is locked into the drum.
A useful tip is to keep the box and receipt for any new cartridge until you have printed at least twenty normal pages. If the cartridge is faulty, returning it is much easier with proof of purchase and packaging.
When to Contact Support
If you have reseated the cartridge, cleaned the corona wire and contacts, completed the correct reset, and confirmed compatibility, but Replace Toner still will not clear, there may be a faulty sensor inside the printer. Note down the exact model, the cartridge code, and the steps you tried. That information will save time when you use the Brother contact and warranty support options for your country.
Conclusion
A Replace Toner message that stays after fitting a new cartridge is usually a detection or counter problem, not a dead printer. Reseat the cartridge until it clicks, clean the corona wire, reset the toner counter for the correct capacity, and check contacts and compatibility. Work through those steps in order and most Brother printers return to Ready within minutes, ready for normal printing again.
Frequently Asked Questions
Can I keep printing when Replace Toner is showing?
On many models you can select Continue in the Replace Toner settings to keep printing for a short time. Print will become lighter as toner truly runs low, so replace or correctly reset a genuine new cartridge as soon as you can.
Why does the message come back after every power off?
This usually means the reset did not save, the cartridge chip or reset gear is faulty, or the contacts are dirty. Repeat the reset with the cover sequence for your exact model and clean the contacts carefully.
Does resetting the toner counter damage the printer?
No, a correct reset for the cartridge you actually installed does not damage the printer. It simply tells the printer a new cartridge is fitted. Resetting an old, nearly empty cartridge can lead to poor print quality and toner spill risk.
Is my new cartridge faulty if another cartridge works?
Yes, that is the most likely explanation. If the printer accepts a different cartridge and clears the message, the first cartridge has a faulty chip, gear, or toner seal problem and should be returned to the seller.
Will a firmware update fix a stuck Replace Toner message?
Sometimes updated firmware improves cartridge detection, but it is not the first fix to try. Complete the reseat and reset steps first, and only update firmware using the official file for your exact model and operating system.
Leave a Reply