
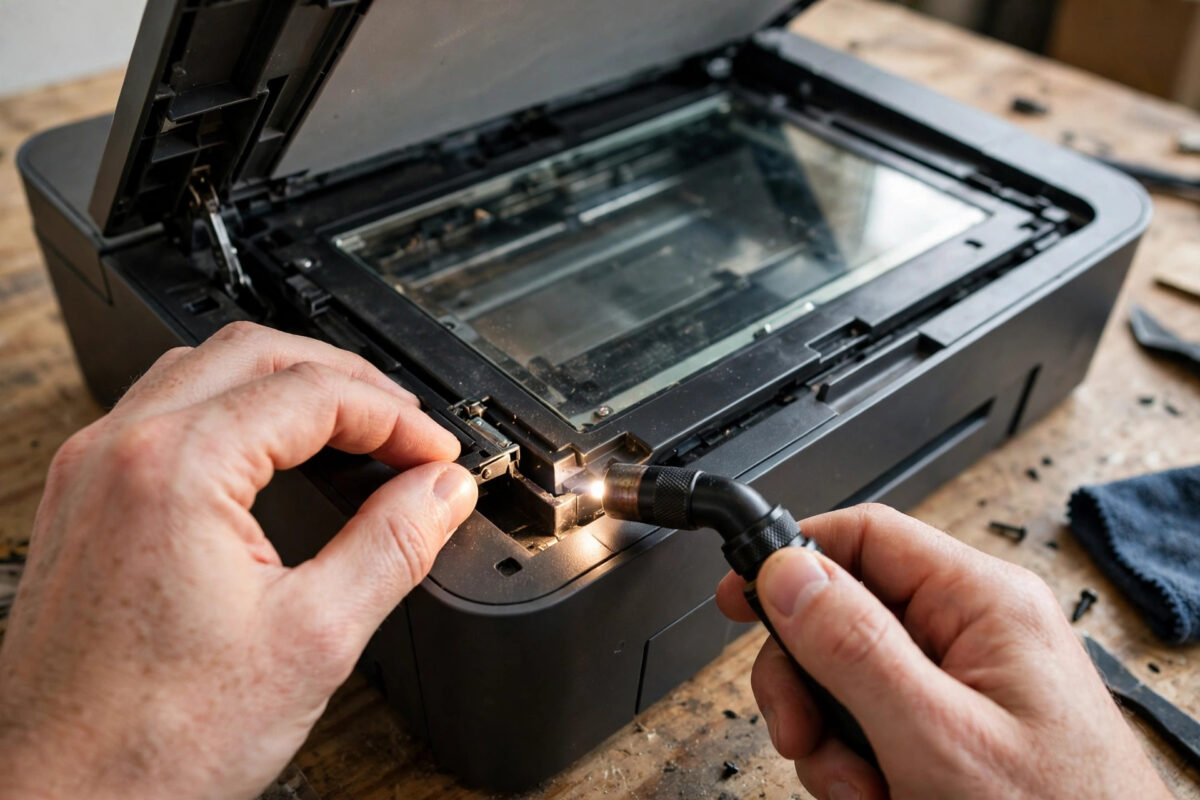
Error 0x69 stops an Epson printer from printing or scanning, often with a warning that the scanner unit is open even when it looks shut. Never force a unit that will not close: the fault is usually a small obstruction, a misaligned cover, or a hinge problem.
This guide explains what 0x69 means and how to fix it safely without a service call.
Quick Answer
Epson error 0x69 usually means the scanner unit is not detected as fully closed, often because paper, a transport lock, packaging material, or a mis-seated cover blocks it, or the hinge is misaligned. Turn the printer off, remove any obstruction, check both hinges and the support arm, close the unit evenly with both hands, and restart. If it still will not latch, do not force it and arrange Epson service.
What Error 0x69 Means on Epson Printers
On many WorkForce and EcoTank models, 0x69 is linked to scanner unit position: a sensor must confirm the scanner section is down and locked and the carriage can move freely. If that confirmation does not arrive, the printer stops to protect the mechanism.
There are two broad possibilities:
- The scanner unit really is not closing fully, so the sensor is telling the truth
- The unit is physically closed, but a sensor, hinge switch, cable, or carriage fault makes the printer think it is open
Start with the physical checks you can see and feel.
Safety First Before You Touch Anything
- Turn the printer off and unplug it from the wall before opening covers fully or reaching inside.
- Never force the scanner unit down. The glass and hinges can crack or bend under pressure.
- Support the scanner unit whenever it is open. Do not let it drop shut.
Step-by-Step: Find Why the Scanner Unit Will Not Close
Step 1: Power Reset and Note the Exact Behaviour
- Turn the printer off, unplug it for two minutes, then plug it back in and turn it on.
- Watch and listen: does the error appear immediately, or after the scanner makes a noise and tries to move?
- Check whether the control panel message mentions scanner unit open, cover open, or only the 0x69 code.
- If the unit visibly sits higher on one side, note which side. That points to the hinge or obstruction to inspect first.
Step 2: Open Fully and Look for Obstructions
- Turn the printer off and unplug it.
- Lift the entire scanner unit as you would to change ink, until the support arm holds it open.
- With a torch, look along the edges where the unit meets the body: check for torn paper, labels, paper clips, packaging tape, blue transport tape, or a pen left on the ledge.
- Check inside the ink carriage area and paper path for jammed paper that has pushed a cover out of place.
- Lower and lift the flatbed cover, the lid over the glass, separately. Confirm it sits flat and its hinges are not cracked or popped out.
- Remove anything you find with care. Do not pull hard on stuck paper; ease it out in the direction of normal travel.
On a new or recently moved printer, also check for a scanner transport lock if your model has one, often marked with a padlock symbol. If left locked after setup, the carriage cannot move. The official Epson support site with manuals for your exact model is the safest place to confirm whether your unit has this lock.
Step 3: Check the Support Arm, Hinges, and Latch Points
- With the unit open, find the support arm or stay that holds it up. Confirm it moves freely and folds back into its slot when you begin to close.
- If the support arm sticks out or is bent, the unit cannot sit down evenly. Gently guide it back into its recess as you lower the unit.
- Inspect both rear hinges for cracks, looseness, or one side sitting higher than the other.
- Look at the front and side latch areas for broken plastic, a mis-seated ink cover, or an ink tank cap left open on EcoTank models.
- On WorkForce models with an automatic document feeder, open and reclose the feeder cover and confirm no page is half-fed at the top.
Step 4: Close the Unit Correctly and Test
- Hold the scanner unit with both hands, one on each side, to keep it level.
- Lower it slowly and evenly. Do not press on the glass or on one corner only.
- In the final centimetre, give a firm, even push until you feel or hear both sides seat. Do not slam it.
- Confirm the gap between the scanner unit and the body looks even all the way around.
- Plug the printer in, turn it on, and wait for the full start-up sequence without opening anything.
- If the error clears, run a copy test from the glass to prove the scanner carriage moves correctly.
If closing feels springy, as if something pushes back, stop and reopen. Something is still trapped or misaligned, and more pressure will damage the hinges. For general handling guidance alongside this fix, our guide on how to clear an Epson paper jam without damaging the printer covers safe paper removal that often uncovers the hidden scrap causing this fault too.
If the Unit Closes But Error 0x69 Remains
Clean and Check the Sensor Area
Dust or a tiny paper fragment near the cover sensor can fool the printer. With the printer unplugged, wipe the mating edges of the body and scanner unit with a dry, lint-free cloth. Do not use liquid inside the printer or dismantle sensor housings.
Check the Scanner Glass and Carriage Movement
Lift only the flatbed lid and look through the glass. The carriage bar should sit parked neatly at one end. If it sits in the middle or looks tilted, the printer may fail its start-up check. Internal carriage faults need service.
Update Firmware Only After the Unit Closes Normally
Do not update firmware while a mechanical error is on screen. Once the unit closes normally, you may check for updates via Epson software. Users who also see the printer vanish from Windows can follow Microsoft support guidance for troubleshooting printer problems in Windows after the hardware error is cleared.
When It Is a Hardware Fault, Not a Setup Problem
Book a repair or contact Epson if any of these apply:
- A hinge is cracked, snapped, or detached, or the unit leans visibly to one side
- The scanner unit will not stay open on its support, or drops suddenly
- You hear grinding, clicking, or repeated carriage banging on start-up
- The glass is cracked or the carriage bar under it is visibly bent
- Error 0x69 returns immediately after a correct, even close with nothing obstructing it
- The printer has been dropped, shipped without locks or packaging, or flooded with ink inside
If the printer is under warranty, contact Epson before opening any screwed panels, because self-repair can affect cover.
Common Mistakes and Helpful Tips
- Forcing the unit down with one hand on a corner: This twists the unit and cracks hinges. Always lower it evenly with both hands.
- Missing the document feeder cover: A feeder cover that is slightly open can hold the whole unit up. Open and reclose every cover, not just the main one.
- Leaving ink covers or tank caps open: On many models these sit under the scanner unit and physically block closing if left up.
- Ignoring the transport lock after moving house or office: Unlock it for normal use and lock it again only for transport, if your model has one.
- Restarting repeatedly without inspecting: If something is trapped, repeated start-ups grind against it. Inspect first, restart second.
- Storing paper or supplies on top of the printer: Weight on the lid warps covers over time and causes intermittent open warnings.
Conclusion
Error 0x69 with a scanner unit that will not close is usually visible once you look: a scrap of paper, an open inner cover, a support arm out of its slot, or a misaligned hinge. Work unplugged, never use force, close evenly with both hands, and test with a copy. If the unit cannot seat, treat it as a hardware fault and get Epson help.
Frequently Asked Questions
Can I keep printing if error 0x69 only affects the scanner?
On most Epson all-in-one models, no. The printer runs a full start-up check and will not print while a scanner error is active, because the units share the same body and safety sensors. Clear the error first, even if you only need to print, otherwise jobs will queue and fail.
Why did error 0x69 appear after I changed the ink?
Changing ink requires lifting the scanner unit, so a cover, cartridge, or tank cap may not have been reseated fully, or the support arm did not fold back correctly on closing. Reopen the unit, confirm every ink cover clicks shut and every cap is closed, then lower the unit evenly and restart.
Does error 0x69 mean the scanner is permanently broken?
Not usually. Most cases are an obstruction, a mis-seated cover, or a hinge alignment issue that can be corrected without parts. It only suggests serious damage when a hinge is broken, the carriage grinds or sits tilted, or the code returns instantly after a clean, even close with nothing in the way.
How hard should I push to close the scanner unit?
Only firm, even pressure with both hands in the final small distance until it seats. If you need real force, or one side resists and springs back, something is wrong. Stop, reopen fully, and check the support arm, inner covers, and edges again rather than pushing harder.
Will resetting the printer to factory settings fix 0x69?
A factory reset does not fix a mechanical closing problem and will erase your network and scan settings, creating more work. Use a simple power reset only. If the unit closes correctly and the sensor area is clean yet the error persists, the fault is likely a sensor or carriage issue for service.
Leave a Reply