
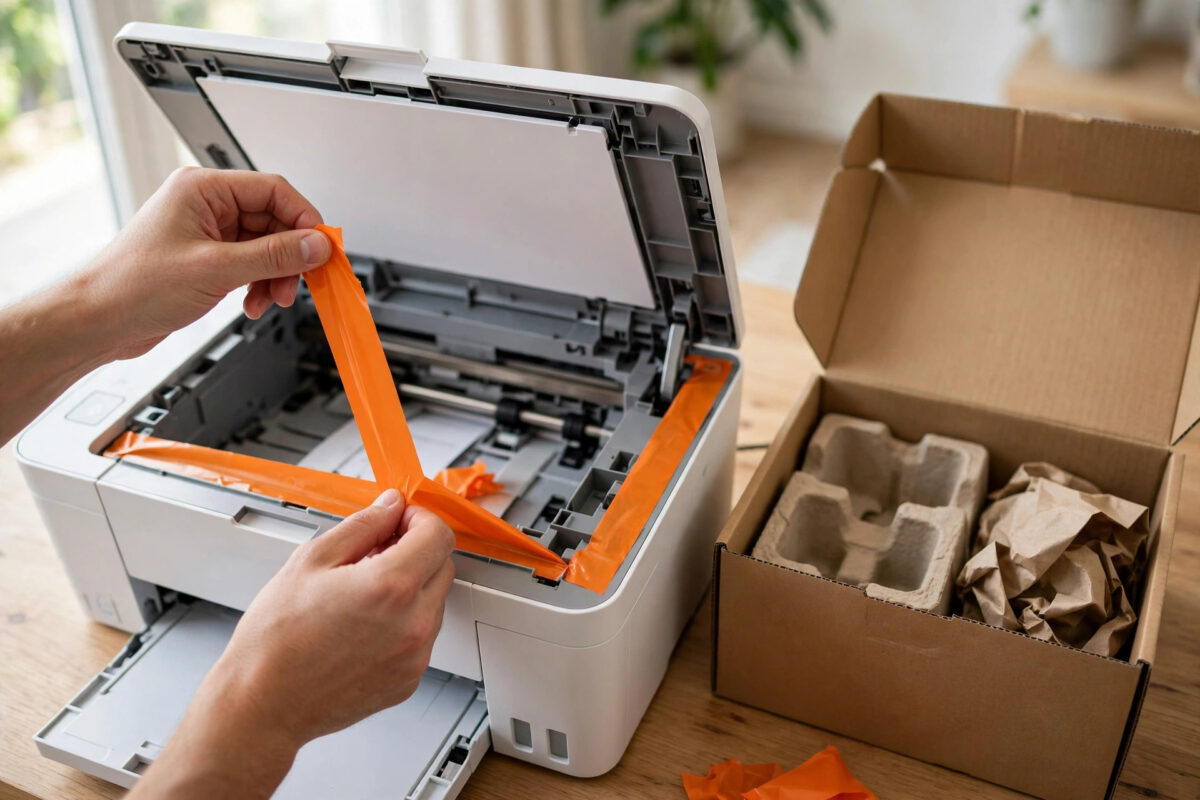
Support code 1890 is supposed to appear once, when a new Canon printer still has its protective material fitted, and disappear as soon as you remove it. So it is especially frustrating when you have taken the orange tape and packing pieces out, checked twice, and the message still will not clear. The printer refuses to print, the setup may be stuck halfway, and every restart brings the same warning back.
Quick Answer
Support code 1890 means the protective material is still detected or the print head holder cannot move correctly. Turn the printer on, open the cover, remove every piece of orange tape and packing material from inside, including pieces under and behind the holder, then make sure no tape remains on the paper path. Close the cover, cancel any stuck print job, and restart the printer. If the holder itself is stuck or a piece is wedged under it, power off, unplug, and remove it gently before trying again.
What Support Code 1890 Is Checking
New Canon inkjet printers ship with protective material that holds the print head holder still during transport. The material is usually bright orange tape, sometimes combined with a plastic piece, so it is easy to spot on a first look. Until that material is removed, the holder cannot travel across the printer to its working positions.
The printer does not have a camera watching for orange tape. It checks movement and position. At startup and during setup it tries to move or verify the holder, and if the movement is blocked or the holder is not where the sensors expect it, the printer reports 1890. That is why the message can also appear on a printer that is not new, if something else, such as a fallen object, a jammed scrap, or a refitted packing piece, blocks the holder in the same way.
Why the Message Survives After You Remove the Obvious Tape
Most people remove the large, visible tape across the top of the holder and assume the job is done. The stubborn cases almost always involve a second piece. There may be tape low down at the side of the holder, a piece under the holder that only shows when the holder moves to the centre, or tape on the output tray and paper support area that holds a part in its shipping position.
Step-by-Step Fix for a Stubborn 1890 Message
- Cancel any waiting print jobs first. On your computer or phone, open the print queue and cancel every job for this printer. On the printer itself, press the Stop or Cancel button to clear the current task. A stuck job created during setup is a frequent reason the code comes straight back.
- Turn the printer on and open the cover fully. The holder needs power to move to the cartridge replacement position in the centre, where you can inspect around it properly. Wait until the holder stops moving and the printer is quiet before you put your hands inside.
- Remove every piece of protective material. Take out anything orange or clearly marked as packing. Check the top of the holder, both sides of it, the area under it as far as you can see with a torch, the space behind it, and the cartridge slots themselves. Remove cartridges if your model setup instructs you to, inspect their slots, and refit them properly afterwards.
- Check the less obvious places. Look at the paper input area, the output tray, under the scanner unit on all-in-one models, and around the paper guides. Some models ship with tape holding the tray or support in place. If a part that should move feels taped down, find and remove that piece rather than pulling the part free.
- Check for anything else blocking the holder. Look for a pen, paper clip, scrap of torn paper, or a piece of the packing itself that has dropped into the holder track. Remove anything you find with tweezers, gently. The holder rail must be completely clear from one side of the printer to the other.
- Close everything and restart cleanly. Close the cover or scanner unit fully, turn the printer off with its power button, wait thirty seconds, and turn it back on. Watch the holder run its startup movement. If it travels normally and the printer shows ready, run the setup or alignment step once more if the printer asks for it.
- Print a test page from the printer menu. Use the built-in nozzle check or status print rather than a document from the computer. This proves the printer itself has cleared the error. Only then send a real print job, so you do not stack a new stuck job on top of an old problem.
The setup diagrams in the official Canon printer setup and support guides show the exact packing pieces for your model, including the small ones that are easy to miss. Comparing your printer against that diagram, piece by piece, is the fastest way to find a hidden strip of tape.
If the Holder Will Not Move to the Centre
If the holder stays parked at the side, turn the printer off, unplug the power cable, and wait a minute. On many Canon models the holder can then be slid very gently by hand toward the centre. This is often where the missing piece reveals itself. A strip of tape can be trapped under the parked holder, invisible from every normal angle. Lift it away, check the rubber parking area beside it as well, and slide the holder back gently before reconnecting power. If the holder will not slide even with the power unplugged and gentle pressure, stop. Something is wedged or the locking mechanism is engaged, and forcing it risks bending the rail.
Once the material is out, our guide to fixing a Canon printer that will not print after new cartridges helps if the next problem you meet is a cartridge recognition or blank page issue during the same setup, which is a common follow-on frustration with new printers.
New Printer Versus Printer That Suddenly Shows 1890
On a brand new printer, assume missed packing material until you have proved otherwise, even if you are sure you removed it all. Work against the manual diagram rather than your memory of what you took out. On a printer that has worked for months, packing material is unlikely unless you refitted it for a move. Look instead for a jam, a foreign object in the holder track, or a cartridge that is not seated and is catching on the frame.
Common Mistakes and Helpful Tips
- Checking only the top of the holder. The piece causing the problem is usually at the side, underneath, or behind it. Use a torch and check the full travel path.
- Leaving the stuck print job in the queue. The printer retries the job, hits the error state again, and looks unfixed. Always cancel the queue as part of the fix.
- Removing material while the holder is moving. Wait until movement stops completely. Reaching in during the startup travel is unsafe for you and the printer.
Conclusion
Support code 1890 that will not clear is almost always a physical story, not a software one. The printer thinks the print head holder is blocked, and it is usually right, even when the blocking piece is a small strip of tape hidden under or behind the holder. Cancel the stuck jobs, inspect the whole holder path with a torch against the setup diagram, remove everything you find, and restart the printer cleanly.
Frequently Asked Questions
I removed all the tape, so why does 1890 keep coming back?
The two usual reasons are a small piece still hidden under or behind the print head holder, and a stuck print job that keeps retriggering the error. Cancel every job in the queue, power the printer off and unplug it, slide the holder gently to the centre, and inspect underneath it with a torch before restarting.
Can support code 1890 appear on an older printer?
Yes. The code means the holder movement or position check has failed, not literally that factory tape is present. On an older printer look for a foreign object in the holder track, a badly seated cartridge catching the frame, torn paper, or tape you fitted yourself before moving the printer.
Is it safe to slide the print head holder by hand?
Only with the printer switched off and unplugged, and only with gentle pressure. Many Canon models allow this for inspection. If the holder does not move with light pressure, do not force it. A holder that is locked solid needs a different approach and possibly a technician.
Do I need to run setup again after clearing 1890?
If the error interrupted the first setup, yes, the printer will normally ask you to complete the remaining steps, such as cartridge installation or alignment, once the code clears. Follow the on-screen or setup sheet steps from the point where it stopped, and finish with a built-in test print.
What if there is no protective material anywhere and the code stays?
First, repeat the check against the official setup diagram for your exact model, because the smallest piece is the one everyone misses. If the track is genuinely clear, the holder moves freely when unplugged, and the code still returns on every startup, the position sensor or holder mechanism may be faulty and you should contact Canon support.
Leave a Reply