
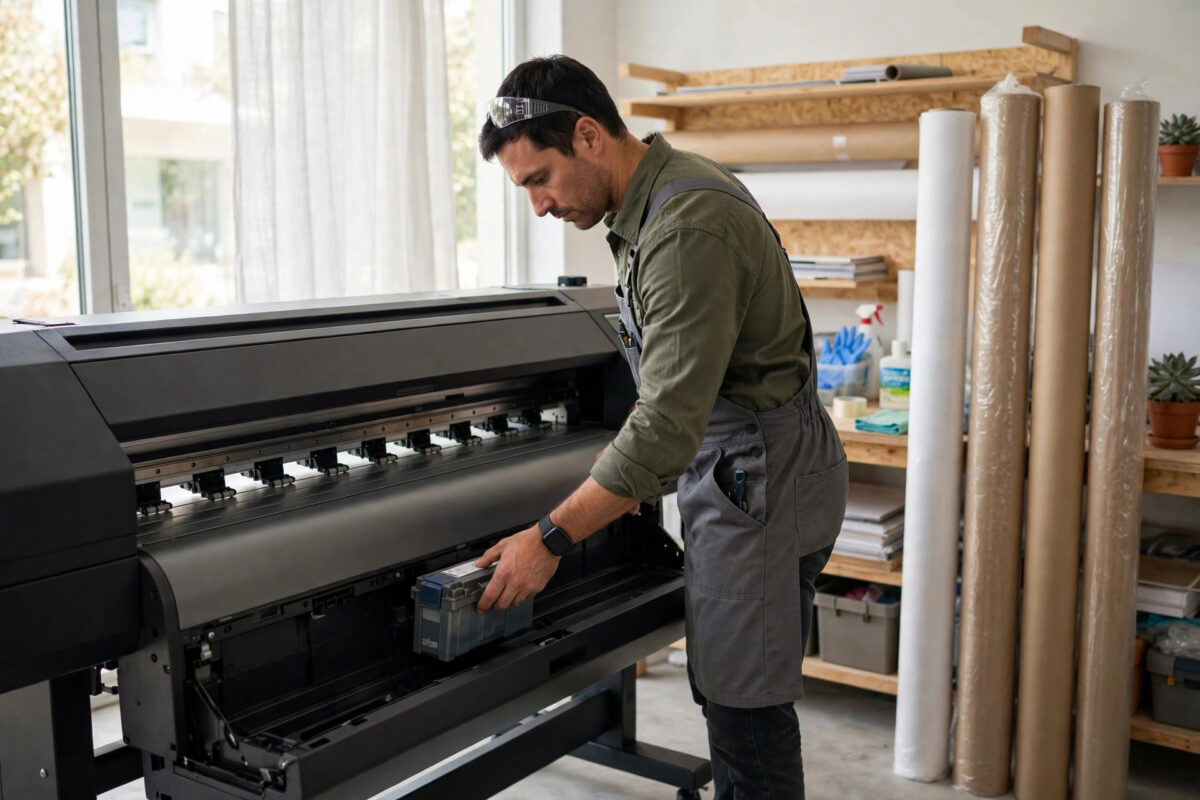
Large format printing stops for small reasons, and a full maintenance cartridge is one of the most common. Your Canon imagePROGRAF warns you that the cartridge is nearly full, then one day it refuses to print until you replace it. That cartridge collects waste ink from print head cleaning, borderless printing, and routine maintenance, so it is a normal consumable, not a sign that something has gone wrong. Replacing it is a simple job, but on a big printer that uses a lot of ink, doing it carelessly can mean leaks, a dirty floor, and an error that will not reset.
Quick Answer
To replace the maintenance cartridge on a Canon imagePROGRAF, leave the printer switched on, open the maintenance cartridge cover, pull the used cartridge out slowly while keeping it level, and dispose of it sealed in its bag. Slide the new genuine cartridge in until it clicks, close the cover, and confirm the message on the screen so the waste ink counter resets. Never reuse or empty the old cartridge, because the printer tracks it with a chip and spilled waste ink can damage the printer and your workspace.
What the Maintenance Cartridge Does
The printer estimates how full the cartridge is and also reads information from a chip on the cartridge itself. When it judges that there is no safe capacity left, it warns you first and then stops printing. This protection matters, because an overflowing cartridge can leak ink inside the printer, damaging sensors, boards, and the stand below.
How Often Will You Need to Change It?
It depends on how you print. Borderless printing uses more maintenance ink because the printer deliberately oversprays the edge of the paper. Frequent head cleaning, long idle periods followed by deep cleaning, and heavy daily use also fill the cartridge faster. A busy studio machine may need a new cartridge every few months, while a lightly used office printer may go much longer.
Before You Begin
- Order the correct cartridge for your exact model. The part number is printed on the old cartridge and listed in the manual, and cartridges that look similar are not always interchangeable.
- Keep the printer switched on unless your manual says otherwise. The screen guides the replacement and the printer needs power to detect the new cartridge and update the counter.
- Do not start the job in the middle of a print. Wait until the printer is idle and the home screen is showing.
- Open the new cartridge box and note the plastic bag inside. You will use that bag, or the bag supplied with the new cartridge, to seal the used one.
For the official part numbers and model-specific diagrams, use the Canon support manuals and consumables information for imagePROGRAF printers for your region, and match the cartridge code character for character before you order.
Step-by-Step: Replacing the Cartridge
- Check the screen message. When the printer asks for replacement, read the full message and tap or select the option to replace the maintenance cartridge if one is offered. On some models the screen shows an animated guide. Follow that guide if it differs slightly from the general steps here.
- Open the maintenance cartridge cover. On most imagePROGRAF models the cartridge sits low at the front, behind a small cover, sometimes on the right side. Open the cover gently and set it aside or let it rest open as designed. You should see the handle of the cartridge.
- Pull the old cartridge out slowly. Grip the handle firmly and pull the cartridge straight toward you in one slow, steady movement. Keep it perfectly level at all times. The most common spill happens when someone tilts the cartridge as it clears the slot, so support it from underneath with your other hand if it feels heavy.
- Seal the used cartridge at once. Place it directly into the plastic bag supplied for disposal, keeping it upright. Seal the bag. Do not set an unbagged used cartridge down on paper, fabric, or a desk, even for a moment, because waste ink can seep from the inlet area.
- Prepare the new cartridge. Take the new cartridge out of its packaging. Remove any tape or protective material described in the manual, but do not touch the chip contacts or the ink inlet. Do not shake the cartridge and do not squeeze its sides.
- Insert the new cartridge. Hold it level by its handle and slide it into the empty slot in the same orientation as the old one. Push it in smoothly until it stops and clicks or sits flush. It should not need force. If it will not go in, take it out and check the orientation rather than pushing harder.
- Close the cover and confirm on screen. Close the maintenance cartridge cover fully. The printer should detect the new cartridge, update its status, and return to the ready screen. If it asks you to confirm that you replaced the cartridge, answer yes. That confirmation is what clears the warning properly.
- Check the status and print a test. Open the ink or consumables status screen and confirm the maintenance cartridge now shows as new or at full available capacity. Print a nozzle check or a small test page to confirm the printer is happy and there are no new errors.
If you manage several large printers in a studio, our guide to fixing uneven colour and banding on large format printers is a helpful companion, because repeated head cleaning to chase a quality problem is one of the fastest ways to fill a maintenance cartridge early.
What to Do With the Used Cartridge
A used maintenance cartridge contains liquid waste ink absorbed into its filling, so treat it as you would any ink waste from your workplace. Keep it sealed in its bag, store it upright until disposal, and follow your local rules for commercial printing waste if you run a business. Never pour the contents out, rinse it, or try to wash and reuse the absorber.
Common Mistakes and Troubleshooting Tips
- Turning the printer off first. On many models this makes the replacement harder, because the on-screen guide and counter update need the printer powered and idle.
- Tilting the old cartridge. This is the main cause of leaks. Slow, level, and supported with two hands is the whole technique.
- Using a cartridge for the wrong model. A near-fit cartridge can jam in the slot or fail to register. Always match the exact part number.
- Forgetting to confirm on screen. If the printer asked a confirmation question and you skipped it, the warning can remain even with a new cartridge fitted. Reopen the status screen and complete the prompt.
- Touching the chip. Grease from fingers on the chip contacts can cause a recognition error. If the new cartridge is not recognised, power the printer down as the manual directs, remove the cartridge, check the chip area is clean and dry, and refit it once.
Conclusion
Replacing the maintenance cartridge on a Canon imagePROGRAF is routine maintenance, not a repair. Keep the printer on and idle, pull the old cartridge out slowly and level, seal it in its bag straight away, slide the new correct cartridge in until it clicks, and confirm the change on screen so the counter resets. That sequence takes only a few minutes and protects the printer from leaks and overflow damage.
Frequently Asked Questions
Can I empty and reuse a maintenance cartridge?
No. The absorber inside is designed for single use, and the printer also tracks the cartridge electronically. Emptying it risks spills, contamination, and damage, and the printer will usually still report it as full because the usage record has not changed. Always fit a new cartridge of the correct type.
Why does the printer still say the cartridge is full after I changed it?
The most common reasons are that the on-screen confirmation was not completed, the cover is not fully closed, or the fitted cartridge is for a different model. Check the status screen, complete any prompt, and refit the cartridge once, keeping it level. If it is a new genuine cartridge and the message stays, record the error and contact support.
Should the printer be on or off during replacement?
For most imagePROGRAF models, leave it on and idle, because the screen guides you and the printer must detect the new cartridge. A small number of older models give different instructions, so your model manual always wins if it says otherwise. Never change the cartridge while a print is running.
How do I know which maintenance cartridge my printer needs?
The part number is printed on the label of the cartridge already in the printer, and it is also listed in the manual and on the Canon product page for your model. Match that number exactly when ordering. Do not rely only on a photo, because several cartridges share a similar shape.
What happens if I ignore the full cartridge warning?
At first the printer warns you and may still print. Once it judges the cartridge to be completely full, it will stop printing until you replace it. Ignoring it beyond that point risks waste ink leaking inside the printer, which can cause far more expensive damage than the cartridge itself.

Leave a Reply