
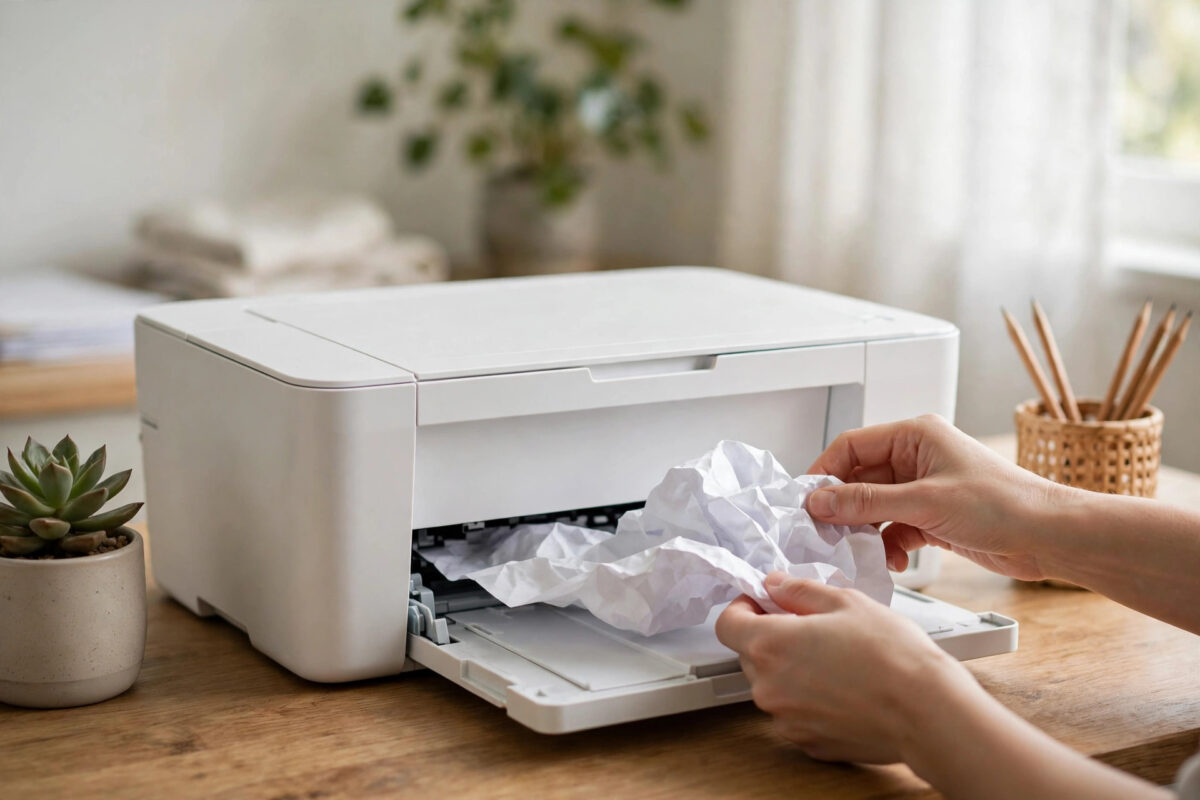
You are in the middle of printing an important document when your Canon printer stops, beeps, and flashes support code 1300 on the screen. The message says there is a paper jam in the front tray area, even if you cannot see any paper stuck at first glance. This is one of the most common Canon errors, and in most cases you can clear it yourself in a few minutes without any tools.
This guide walks you through the safest way to remove jammed paper from the front, check the areas people often miss, and stop the same jam from happening again. The steps work for most Canon PIXMA and MAXIFY models that show this code.
Quick Answer
Turn the printer off and unplug it, then open the front cover and look inside the front tray area for stuck paper. Pull any jammed sheet out slowly with both hands, straight toward you, and never force it or tear it. Check for small torn scraps, close everything firmly, plug the printer back in, and press the Black or Color start button to clear the error and resume.
What Support Code 1300 Actually Means
Support code 1300 means the printer’s sensors have detected paper stopped in the front paper feed path. The paper may be crumpled near the rollers, folded at one corner, or stuck just inside the slot where sheets enter the machine. Sometimes there is no full sheet at all, only a tiny torn corner left behind from an earlier jam.
The printer stops on purpose when it sees this problem. If it kept pulling, the paper could wrap around the rollers and cause real damage. That is why the error will not go away until the path is fully clear and the cover is closed properly.
Before You Start: Safety and Preparation
A paper jam fix is simple, but a little care protects both you and the printer. Follow these steps first:
- Press the power button to turn the printer off.
- Unplug the power cord from the back of the printer. This stops the rollers from moving while your hands are inside.
- Remove any loose paper from the rear tray or cassette so it does not feed in by accident.
- Work in good light. A phone flashlight helps you see deep inside the front slot.
- Wash and dry your hands. Paper dust and ink on your fingers can leave marks on the rollers.
Step-by-Step: Clear the Jam From the Front Tray
Step 1: Open the Front Cover and Output Tray
Open the front cover the same way you do when you change ink cartridges, then pull out the paper output tray and its extension. On many models the scanning unit lifts up as one piece. Prop it open fully so it stays in place and gives you a clear view inside.
Wait a few seconds for the ink cartridge holder to stop moving. If it is in the way, do not push it by force. It should rest to one side when the power is off and the cover is open.
Step 2: Look for the Jammed Sheet
Shine your light into the front feed slot and along the paper path. Look for:
- A sheet folded like an accordion near the rollers
- A corner bent over or curled under
- Paper visible only as a thin white edge deep inside
- Loose scraps, labels, or tape stuck to a roller
Also check the area right under the print head. Small pieces often hide there after a bad jam.
Step 3: Pull the Paper Out Slowly
This is the most important step. Hold the jammed sheet with both hands, one on each side, as close to where it enters the printer as you can. Pull it straight out toward you, slowly and evenly.
Keep these rules in mind:
- Pull in the normal direction the paper travels, not backward.
- Use steady, gentle pressure. If it resists, stop and check for a folded corner.
- Never yank. A hard pull is how sheets tear and leave scraps behind.
- If the sheet tears, make a note of the shape. You will need to find the missing piece.
If you cannot grip the paper from the front, some models let you open a rear cover or pull out the cassette for a second view of the path. Only open covers your manual shows as user-accessible.
Step 4: Hunt for Torn Scraps and Foreign Objects
More failed fixes come from a missed scrap than from the main sheet. Slowly turn the printer so light falls into the slot from different angles. Run a clean fingertip very lightly along the path to feel for a stuck edge.
Common leftovers include torn corners, sticky label backs, paper clips, staples, and bits of tape from reused paper. Remove anything you find. If a scrap is deep inside and you cannot reach it safely, do not dig for it with tools. That is a job for a service technician.
Step 5: Close Up and Clear the Error
- Lower the scanning unit or front cover and close it until it clicks.
- Push the output tray back to its normal position.
- Plug the power cord back in and turn the printer on.
- Load a few sheets of clean, plain paper correctly.
- When the printer asks, press the Black or Color button to resume and clear the code.
- Print a test page or nozzle check to confirm the path is clear.
If the test page feeds smoothly and comes out straight, the jam is fixed. If the code comes straight back, go through the path once more. A second check usually finds the scrap missed the first time.
Reload the Paper the Right Way
How you reload matters as much as how you removed the jam. Bad loading is the top cause of repeat jams.
- Take the stack out and fan the sheets so none stick together.
- Tap the stack on a flat table to align all the edges.
- Load only the amount your tray is rated for. Do not overfill past the mark.
- Slide the paper guides snug against the stack. They should touch, not squeeze.
- Make sure the paper size setting on the printer matches the paper you loaded.
Canon explains paper handling and jam locations in detail in the Canon online manual guidance for paper jams, which is worth checking for drawings specific to your exact model.
Why the Jam Happened in the First Place
Understanding the cause helps you prevent the next one. The usual reasons are:
- Mixed or damaged paper: Curled, damp, folded, or mixed-size sheets feed unevenly.
- Guides set wrong: Loose guides let paper enter at an angle and crumple.
- Too much paper: An overfilled tray makes the rollers grab two sheets at once.
- Dusty rollers: Paper dust builds up over time and reduces grip, so sheets slip and bunch.
- Wrong paper type: Very thick card or labels fed from the wrong tray can stop mid-path.
Paper problems and connection problems often get confused, because both stop a job halfway. If your printer clears the jam but then disappears from your computer, follow our guide to fixing a printer that keeps showing offline to sort the connection side out separately.
Common Mistakes to Avoid
- Pulling paper out backward: This can strip the small gears that drive the rollers.
- Forcing the cover: If a cover will not close, something is not seated. Forcing it breaks plastic clips.
- Skipping the scrap check: One tiny corner left inside will trigger code 1300 again instantly.
- Using torn or taped paper: Reused damaged sheets are a guaranteed repeat jam.
- Ignoring the paper setting: A mismatch between loaded paper and the driver setting confuses the feed timing.
- Turning the printer on mid-fix: Moving rollers and hands inside do not mix. Finish first, then power up.
When to Stop and Get Help
Stop and seek service if paper is wrapped tightly around a roller you cannot reach, you smell burning, you hear grinding after the path looks clear, or the code returns with no paper loaded. Those signs can point to a damaged sensor or roller, and more pulling will not help.
Conclusion
Support code 1300 looks alarming, but it is usually just paper stopped in the front feed path. Power down, open the front, pull the sheet out slowly with both hands, and take your time hunting for torn scraps. Reload clean paper with the guides snug, close everything firmly, and resume the job. Do those steps carefully and your Canon should be printing again within minutes, with no repeat jam.
Frequently Asked Questions
Why does code 1300 appear when I cannot see any paper?
A small torn corner or a bit of label is often hidden deep in the slot or under the print head. The sensor still sees it even when you cannot. Use a flashlight, check from different angles, and feel lightly along the path for a stuck edge.
Can I pull the jammed paper out from the back instead?
Only if your model has a rear cover designed to open for jam removal. Pulling paper backward against its normal travel direction can damage the feed gears, so the front route described in your manual is always the safer first choice.
The error cleared but pages now come out crooked. What should I do?
Reload the paper with the edges aligned and the guides snug against the stack. Then run the print head alignment from the maintenance menu. A crooked feed after a jam usually means the guides moved while you were removing the paper.
How do I stop code 1300 from coming back?
Use clean, dry, flat paper, do not overfill the tray, and keep the paper size setting matched to what is loaded. Fan the stack before loading and run roller cleaning every few months if your model offers it.
Will turning the printer off and on clear the code by itself?
No. Restarting without removing the jam just makes the printer check the path again and show the same code. The paper and any scraps must come out first, then a restart or resume button press will clear it.
Leave a Reply