
You switch on your Canon printer, expecting the usual quiet hum, and instead it makes a loud grinding or ratcheting noise for several seconds. Then the power and alarm lights flash, the print job stops, and error 5C20 appears on the screen or in the printer status window on your computer. It sounds serious, and in some ways it is, because the printer has stopped itself to avoid further damage. The good news is that the cause is often something small stuck in the paper path, a carriage that cannot move freely, or a purge unit that needs attention rather than a completely dead machine.
Quick Answer
Canon error 5C20 usually means the purge unit, the part that cleans the print head and handles waste ink, is not moving correctly, and the grinding noise is a motor or gear struggling against a blockage. Turn the printer off, unplug it, and check carefully for jammed paper, a foreign object, or a carriage stuck out of position. Remove any obstruction gently, make sure the ink cartridges are seated properly, then restart the printer. If the noise and error return with a clear paper path, the purge unit or its motor likely needs professional service.
What Error 5C20 Actually Means
Canon does not publish a long public explanation for every code, but on PIXMA and similar inkjet models 5C20 is linked to the purge unit. The purge unit sits under the place where the carriage parks when the printer is idle. It wipes the print head, caps it so the nozzles do not dry out, and pumps a small amount of ink during cleaning cycles.
Why You Hear Grinding at the Same Time
The grinding sound is mechanical. A small motor turns plastic gears that drive the purge unit and sometimes the paper feed. If a gear is trying to turn against something that will not move, the teeth slip or chatter and you hear a loud ratcheting noise. The same sound can happen if the carriage itself is blocked and its drive belt jumps on the pulley.
Before You Start: Safety and Tools
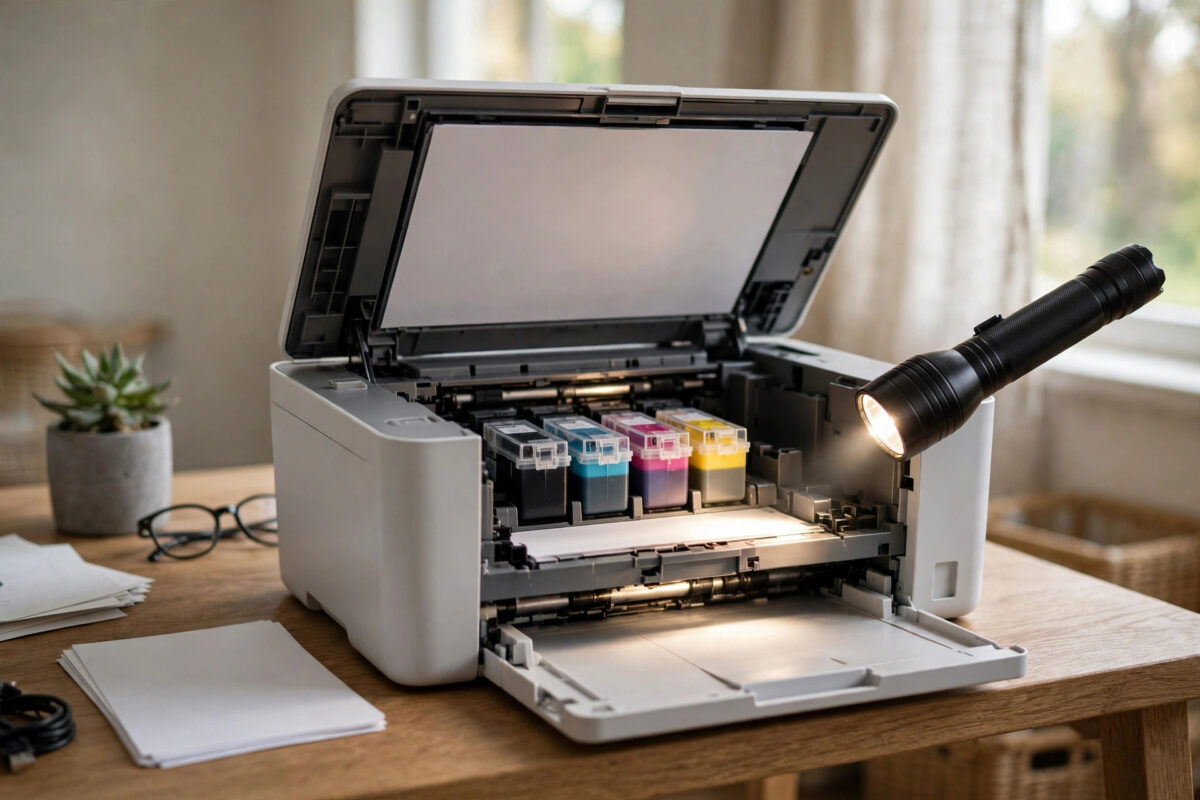
- A torch or phone light so you can see into the paper path clearly.
- A pair of tweezers for lifting out a small piece of torn paper.
- A soft, dry, lint-free cloth for wiping dust from accessible areas.
- A flat, stable table with enough space to open the printer fully.
Step-by-Step Checks for Error 5C20
For all of these checks, turn the printer off with its power button first, then unplug the power cable and wait at least a minute. Work slowly, and test once after each major check.
- Look for jammed or torn paper. Open the top cover and the rear access panel if your model has one. Shine a light along the whole paper path, from the input tray to the output slot. Remove any sheet you find by pulling it gently in the normal direction of travel. Check for tiny torn corners, labels, or a paper clip, because even a small scrap near the purge area can stop the mechanism.
- Check the carriage movement. With the power still unplugged, open the cover and look at the carriage, the unit that holds the ink cartridges. On many models you can slide it very gently by hand toward the centre. It should move smoothly with light resistance. If it will not move at all, do not force it. Look for a cartridge that sits higher than the others, a ribbon cable folded the wrong way, or debris under the carriage rail.
- Reseat the ink cartridges. Remove each cartridge or ink tank following the instructions for your model, then refit it until it clicks or sits level. A cartridge that is slightly raised can catch on the frame during startup and trigger both the noise and the error. While they are out, check that no protective tape remains on a newly installed cartridge.
- Inspect the purge and parking area. The carriage parks on one side, usually the right. Look at that area with a torch. You may see the rubber cap and wiper. Make sure nothing obvious, such as a chunk of dried ink mixed with paper dust or a fallen object, is sitting on top of it. Wipe only what you can reach easily with a dry cloth. Do not dismantle the purge unit itself.
- Check the encoder strip. Behind the carriage rail there is a thin, clear plastic strip that runs across the printer. It tells the printer where the carriage is. If it is dirty, loose, or out of its slots at either end, the carriage may slam or hunt for position and make extra noise. You can clean it very gently with a dry cloth. If it has come detached, that is normally a service job.
- Restart the printer cleanly. Close all covers, reconnect the power cable directly to a wall socket rather than a worn extension lead, and turn the printer on. Listen carefully. A normal startup has short, soft movements. If the printer reaches the ready state, print a nozzle check page from the maintenance menu before trying a real document.
- Run one maintenance cycle only. If the error has cleared but print quality is poor, run a single standard cleaning from the driver or printer menu. Avoid running deep cleaning repeatedly, because it uses a lot of ink and puts extra work on the same purge mechanism you have just been checking.
If your printer is still under warranty, stop at this point and contact support rather than opening panels that need screws removed. You can find downloads and contact options through the official Canon support and driver download centre for your region. Keeping a note of when the noise happens, and whether it starts before the carriage moves, helps the technician diagnose the fault faster.
Other Causes Worth Ruling Out
Low-quality or refitted cartridges can also cause trouble if their shape differs slightly from the original. If the error began right after a cartridge change, try refitting the previous cartridge if you still have it, or test with a known genuine set. Our complete guide to fixing a Canon printer that keeps going offline is also useful after the repair, because a printer that has been unplugged and moved often needs its connection set up again cleanly.
Common Mistakes to Avoid
- Forcing the carriage. If it does not slide with gentle pressure, forcing it can bend the rail or tear the encoder strip.
- Restarting repeatedly. Ten failed startups in a row wear the gears and do not give the printer any new information.
- Pulling jammed paper backwards with force. This can leave scraps behind and damage feed rollers. Pull slowly in the direction the paper normally travels.
- Ignoring a new noise after a cartridge change. Always reseat the cartridges first. It is the simplest cause and the easiest one to miss.
Conclusion
Error 5C20 with a loud grinding noise at startup is your Canon printer reporting that a key mechanical part, most often the purge unit, cannot move as expected. Start with the safe basics: power off and unplugged, a careful check for paper and objects, properly seated cartridges, and a close look at the carriage, encoder strip, and parking area. Test once after each check and listen to what changes.
If the noise is harsh, the carriage is stuck solid, or the error returns every time with a clear paper path, the fault is likely worn or damaged hardware and needs professional repair. Stopping early in that situation is not giving up. It protects the printer from extra damage and gives a technician a machine that is still worth fixing.
Frequently Asked Questions
Can I keep using the printer if 5C20 only appears sometimes?
It is better not to. An intermittent 5C20 usually means the mechanism is struggling and only sometimes completes its movement. Continued use can wear the gears further and turn a repairable fault into a permanent one. Run the basic checks in this guide, and if the error keeps returning, book a repair.
Is error 5C20 the same as a paper jam error?
No, although a jam can cause it. A normal paper jam error means the printer detected paper in the wrong place. Error 5C20 points more specifically to the purge unit cycle failing. A hidden scrap of paper can block that cycle, which is why the paper path check is still the first step.
Will resetting the printer clear 5C20?
A simple power reset, unplugging the printer for a minute and restarting it, is worth trying once after you have checked for blockages. It will not repair a stuck or worn purge unit. Factory resets and waste ink counter resets do not fix a mechanical grinding fault and can hide warnings the printer needs.
How much does a purge unit repair usually involve?
A technician normally has to open the printer, test the purge motor and gears, and replace worn parts before re-timing the unit. Labour is often the largest part of the cost. On a low-cost home printer the quote may be close to the price of a new machine, so ask for the full price before you approve the work.
Why does the grinding happen only at startup?
Startup is when the printer runs its full mechanical self-check, including the purge cycle and carriage movement. During normal printing those parts move in smaller, quieter ways. A blockage or worn gear therefore shows up most clearly in the first few seconds after you switch the printer on.

Leave a Reply