
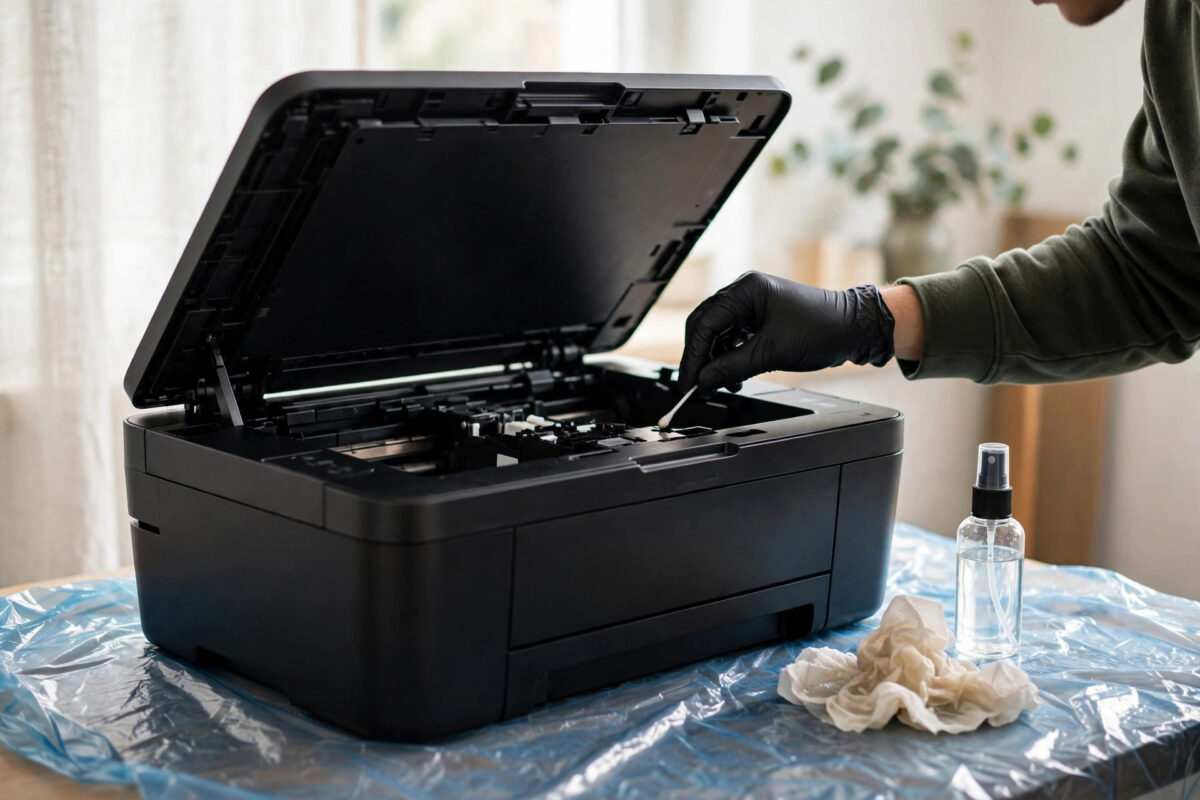
Automatic cleaning cycles are the first thing every Epson owner tries when prints come out faint, streaky, or missing colours. Usually they work. But when you have run three or four cycles, used a lot of ink, and the nozzle check still shows the same gaps, it is time to stop pressing that button. Repeated cycles can overheat the printhead, flood the waste pads, and still leave the dried ink exactly where it was.
A careful manual clean is the next step. It uses warm distilled water or a proper printhead cleaning fluid to soften dried ink from the outside, without opening the printhead itself. This guide explains the safest paper-towel method and the cartridge-port method, when to use each one, and how to tell the difference between a clog you can clear and a printhead that has failed. Take it slowly. Most damage during manual cleaning comes from rushing or using too much force or liquid.
Quick Answer
To unclog an Epson printhead manually, turn the printer off with the carriage free, place a folded paper towel dampened with warm distilled water or cleaning fluid under the printhead, and let it sit for several hours to dissolve dried ink. Gently slide the printhead over the towel a few times, replace the towel until it comes away cleaner, then run one nozzle check. Stop if there is no improvement after two attempts.
Why Printheads Clog and Why Cycles Stop Working
Epson printheads use tiny nozzles that push out microscopic drops of ink. The ink dries quickly on paper, which is exactly what you want, but it also dries inside a nozzle that has not been used for a while. Heat, low humidity, long gaps between prints, and nearly empty cartridges all make clogs more likely.
A cleaning cycle pulls ink through with pressure. That works for fresh blockages, but a hard dried plug will not dissolve under pressure. Manual soaking softens it slowly from the outside, without stress on the nozzles.
First confirm you have a clog: print a nozzle check. Missing sections in one colour point to a clog in that colour. Faint print in all colours can also mean low ink or air in the lines.
You need warm distilled water or proper printhead cleaning fluid, plain paper towels, gloves, and a syringe with soft tubing only for the second method. Avoid tap water, harsh solvents, and window cleaner, which can damage the delicate printhead coating.
Method 1: The Paper Towel Soak (Safest First Choice)
Step 1: Free the Printhead
- Turn the printer on and open the cover.
- Start a cartridge replacement or printhead cleaning routine so the carriage moves away from its resting position.
- When the carriage is in the middle, unplug the power cable. This keeps the carriage free so you can move it by hand.
- If your model has removable cartridges, take them out and place them upright on a plastic sheet. Keep the ink ports covered and note the colour order.
Step 2: Protect the Printer and Place the Towel
- Cut or fold a paper towel into a strip wide enough to sit under the printhead and long enough to span its path.
- Dampen the strip with warm distilled water or cleaning fluid. It should be wet but not dripping.
- Slide the strip flat onto the area where the printhead travels, below the carriage.
- Gently slide the carriage over the damp strip so the printhead rests on it.
Step 3: Soak and Wipe Gently
- Leave the printhead resting on the damp towel for at least two to three hours. For an old clog, leave it overnight.
- Every few hours, slide the carriage slowly left and right a short distance over the towel. This gentle wiping helps loosened ink transfer onto the towel.
- Replace the towel when it becomes heavily stained, and dampen the new one in the same way.
- When the towel starts coming away much cleaner, remove it completely and check for scraps of paper fibre under the carriage.
Step 4: Reassemble and Test Once
- Slide the carriage back to a central position, refit the cartridges in the correct order if you removed them, and close the cover.
- Plug the printer in and turn it on. Let it finish its start-up routine without interruption.
- Print one nozzle check only. Compare it with the check you printed before cleaning.
- If there is clear improvement but some gaps remain, run one automatic cleaning cycle and check again.
Improvement is a good sign. It means the soak is working and a second overnight soak will often finish the job. No change at all after two soaks points to a deeper problem, such as air in the lines or a failing printhead.
Method 2: Gentle Flush Through the Cartridge Ports
Use this only if the soak helps slightly but one colour stays blocked. Each cartridge sits on an ink intake port; fluid dripped onto that port softens the clog from above.
- Free the carriage and remove the cartridges as described above.
- Place a dry paper towel under the printhead to catch any fluid.
- Put a few drops of cleaning fluid directly onto the intake port for the blocked colour only. Do not flood the carriage.
- Wait 30 to 60 minutes, then refit the cartridges.
- Run one cleaning cycle and one nozzle check.
If you use a syringe and tubing, apply almost no pressure. The goal is to let fluid sit and soak, not to blast ink through. Strong pressure can delaminate the printhead, which cannot be repaired. If you feel resistance, stop. For official maintenance guidance for your model, refer to the Epson support centre and product manuals before attempting any internal cleaning.
Special Notes for EcoTank Printers
EcoTank ink travels from tanks through tubes to the printhead. If all colours are faint after sitting unused, air in the tubes may be the issue, not a simple clog.
Check the tank levels through the windows at the front and confirm every tank is above the lower line. Look at the tubes for large air gaps. Use the power cleaning or ink flushing option in the maintenance menu only as Epson directs for your model, and only once, because it uses a large amount of ink and fills the maintenance box quickly. If your EcoTank is also showing colour problems, our guide on why an Epson EcoTank prints pink instead of red explains the colour-specific checks that overlap with clog problems.
Common Mistakes That Make Clogs Worse
- Running cycle after cycle: More than three automatic cycles in a row wastes ink, overheats the head, and rarely clears a hard clog. Soak instead.
- Using boiling water: Water should be warm, never hot. Heat can warp plastic parts and damage the printhead coating.
- Scrubbing the printhead: Never rub the underside of the printhead with a dry towel or brush. Gentle contact with a damp towel is enough.
- Leaving cartridges out overnight: Cartridge ports dry out quickly. Keep removed cartridges covered, upright, and out of direct light, and finish the job the same day where possible.
To prevent the next clog, print in colour weekly, leave the printer plugged in, and turn it off with its power button so the printhead parks correctly.
When Manual Cleaning Will Not Help
Be honest about the limits. If the nozzle check shows no improvement after two careful soaks, if the same complete colour has been missing for months, if you see ink leaking inside the machine, or if the printer reports a printhead or service error, the problem is likely electrical or mechanical failure rather than dried ink. At that point, compare the cost of a professional clean or printhead replacement with the price of a new printer. On many home models, a replacement printhead fitted by a technician costs close to a new machine, so get a written quote first.
Conclusion
When cleaning cycles stop working, do not keep repeating them. A slow manual soak with a damp paper towel, warm distilled water or proper cleaning fluid, and a single test check afterwards gives dried ink the time it needs to soften without stressing the printhead. Work gently, keep liquid controlled, and judge the result by the nozzle check, not by hope. If two careful attempts change nothing, stop and get a quote, because continuing can damage a printhead that a technician might still save.
Frequently Asked Questions
How long should I soak an Epson printhead to unclog it?
Allow at least two to three hours for a recent clog and overnight for one that has built up over weeks. Check the towel every few hours, replace it when it is heavily stained, and keep it damp rather than dripping wet. Short ten-minute soaks rarely soften hard, dried ink.
Can I use tap water instead of distilled water?
Distilled water is safer because it leaves no mineral deposits in the tiny nozzles. If distilled water is not available, use clean filtered water as a one-off and avoid making it a habit. Never use hot water, and never pour water directly into the printer.
Why does the nozzle check improve, then get worse again?
This often means loosened ink and air are moving through the system. Run one automatic cycle, then leave the printer switched on and parked for several hours so air can settle. If the pattern keeps changing between colours, have the ink lines and dampers checked.
Is printhead cleaning fluid better than water?
For old, stubborn clogs, a fluid made for inkjet printheads usually dissolves dye and pigment residue faster than water alone. For a light, recent clog, warm distilled water is often enough and is the gentler first choice. Follow the fluid maker’s dilution and safety instructions exactly.
Will manual cleaning void my Epson warranty?
It can, if you open sealed parts, damage the printhead, or use unapproved chemicals. If your printer is still under warranty, contact Epson first and follow their guided cleaning steps. Keep receipts and notes of what you tried, so support can see you followed a reasonable process.
[…] outside. Follow a careful, model-safe method and never scrub the printhead. Our detailed guide on how to unclog an Epson printhead manually when cleaning cycles fail walks through that process step by step, including the safety […]