
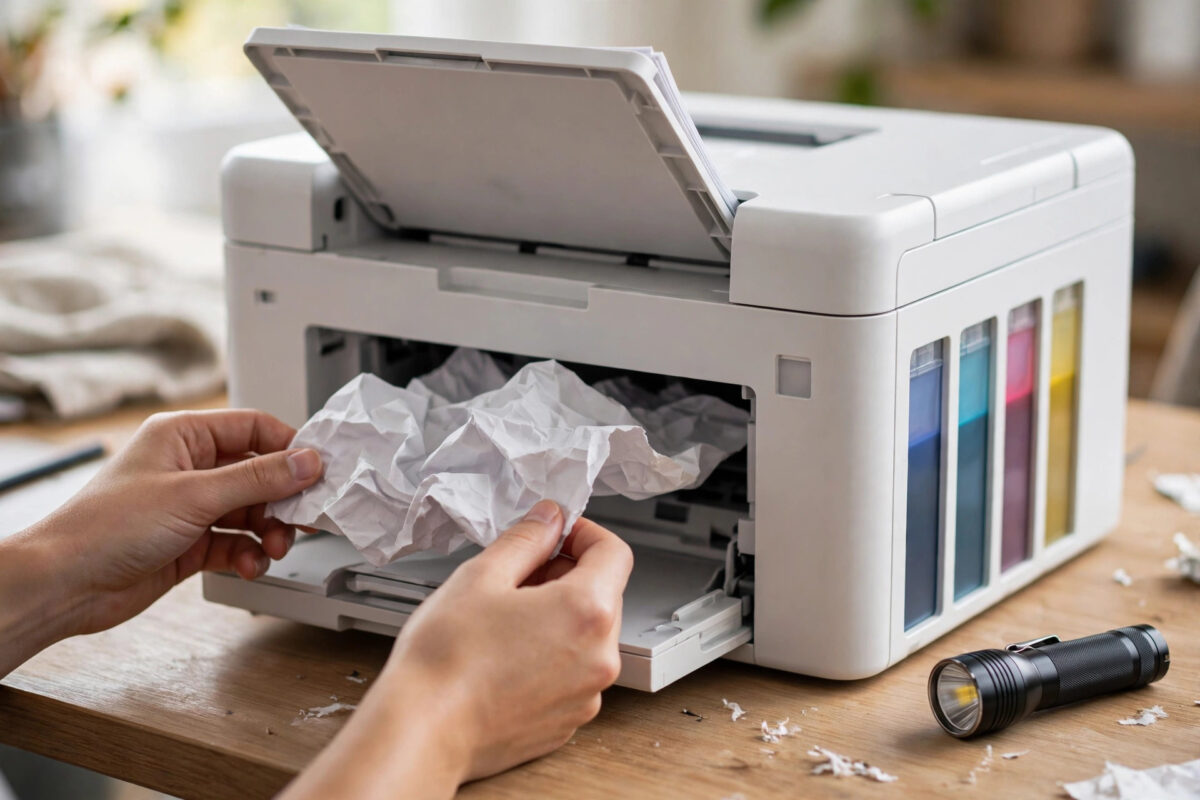
A paper jam in the rear tray of a Canon G7020 MegaTank can stop a job at the worst moment. The printer makes a crumpling sound, the paper stops halfway, and an error appears on the screen. Many people pull hard on the visible edge, which is exactly what tears the sheet and leaves small pieces deep inside where fingers cannot reach.
The G7020 rear path is straight and narrow, which suits thick paper but is less forgiving if paper is loaded crooked or curled. Clearing a jam safely takes patience, not force. This guide shows how to remove it, check for torn pieces, and reload correctly.
Quick Answer
Turn the G7020 off and unplug it, open the rear tray and the scanning unit cover, and pull the jammed sheet out slowly from the rear in the direction it was feeding, using both hands evenly. Check the rear slot, inside rollers, and output area for torn pieces with a flashlight, remove any scraps, close everything firmly, plug the printer back in, and press OK to clear the error before printing a test page.
Why Paper Jams Happen in the Rear Tray
The rear tray feeds paper almost straight down through the printer. That straight path suits thicker paper, photo paper, and envelopes, but it tolerates loading mistakes less than the front cassette does.
The most common cause is paper guides that are too loose or too tight. If the guides do not touch the stack lightly, the top sheet enters at an angle and one corner folds. If they squeeze too hard, the paper buckles before it feeds.
The second cause is overloading or mixing paper types. The rear tray is meant for a small number of sheets of one type at a time. Mixing plain paper under photo paper, or using damp, curled, or warped paper that was already printed on one side, invites a jam.
The third cause is debris from an earlier jam. A tiny torn corner on a roller will catch the next sheet in the same place.
Safety Rules Before You Touch the Jam
- Cancel the job on your computer or phone first, so the printer does not try to feed again when the error clears.
- Turn the printer off with its power button, then unplug the cable from the wall. Moving parts can start without warning if power is left on.
- Wait one minute. This also lets the print head park correctly.
- Remove paper that is still loaded correctly in the rear tray and set it aside. Do not clear a jam with a full tray pressing on the stuck sheet.
- Work in good light with a flashlight ready.
- Never use scissors, sharp tweezers, screwdrivers, or knives inside. Metal tools scratch rollers and damage sensors. Fingers and a soft cloth are enough in almost every case.
The Canon G7000 series manual page on removing jammed paper shows the rear and inside access points for this printer family.
Step-by-Step: Clear the Jam
Part 1: Remove Paper Visible in the Rear Tray
- Stand behind the printer facing the rear tray. Open the rear tray cover fully and extend the support.
- Look into the feed slot. Note whether the sheet is crumpled at the top, folded in the middle, or straight but stuck.
- Hold the sheet with both hands, one on each side, close to the slot. Keep it flat and centered.
- Pull slowly upward and outward, with even pressure from both hands. Do not yank, twist, or pull from one corner.
- If it resists strongly, stop. Do not increase force. Check from inside in Part 2, because part of the sheet may be wrapped around a roller.
- Once the sheet is out, lay it flat. Is it whole, with all four corners? If a corner or strip is missing, that piece is still inside and must be found.
Part 2: Check Inside the Printer
- Go to the front and lift the scanning unit until it locks open. You can now see the carriage area and paper path from above.
- Look for paper under the carriage or crumpled by the rollers. Use the flashlight and check left, center, and right.
- If you see the other end of the sheet inside, hold it gently with both hands and pull slowly toward you, keeping pressure even. A gentle pull from inside after a gentle pull from the rear can free a sheet folded in the middle. Never force either side.
- Check the front output slot too. A sheet that fed almost fully through may be bunched just inside the exit. Pull it forward through the output only if it is already most of the way out.
- Remove scraps with your fingers. If a scrap is in a narrow gap, wrap a soft dry cloth around one finger and sweep gently. Do not blow into the printer, as moisture and dust cause future jams.
Clear the Error and Test
- Close the scanning unit firmly, plug the power cable back in, and turn the printer on.
- If the jam message still shows, press OK on the panel to clear it after confirming paper is removed.
- For the first test, load two or three fresh flat sheets of plain paper in the front cassette, not the rear tray.
- Print a nozzle check or test page from Maintenance. It should feed smoothly with no crumpling sound.
- If that works, test the rear tray with a single correctly loaded sheet and a simple page.
- If the error returns immediately with no paper inside, unplug for two minutes, check once more for a tiny scrap on a sensor, then restart. A small piece covering a sensor can keep the error active when the path looks empty.
If your computer still shows a jam or offline message after the printer says Ready, clear the stuck job from the print queue and follow our guide to fixing a printer that keeps showing offline to resync the status.
How to Load the Rear Tray Correctly
- Use flat, dry paper that is not curled. Fan the small stack, tap it on a table to align edges, and remove bent sheets.
- Open the rear tray, pull out the support, and slide the side guides wide.
- Load only the recommended number of sheets for that type. For photo or thick paper, load one sheet at a time if you have had jams before. Keep plain paper stacks in the rear tray small.
- Place paper print side up as marked, slide it down until it stops gently, then move the guides to touch the edges lightly without bending the paper.
- On the printer screen and in print settings, select Rear Tray as the source and set the exact paper type and size. A mismatch changes feed strength and speed and can cause a jam.
- Do not add paper while a rear tray job is printing. Wait until it finishes.
Avoid paper with holes, creases, or peeling stickers. Store paper flat and use the front cassette for large jobs.
Common Mistakes to Avoid
- Pulling hard from one corner: This turns a simple jam into a torn-paper problem. Always use both hands with slow, even pressure.
- Forcing paper in the wrong direction: If a sheet is wrapped around a roller, forcing it backward can damage the roller. If the rear pull resists, check from inside first.
- Forgetting torn pieces: Removing the main sheet is not enough. One small corner left inside guarantees another jam.
- Leaving power on: The carriage can move into your hands and the feed timing can be harmed. Always switch off and unplug.
- Overloading the rear tray: It is for convenience and specialty media, not bulk plain paper.
- Reusing the jammed sheet: Its folds and fibers will jam again. Discard crumpled sheets.
When the Jam Will Not Clear
If you cannot reach the paper, or the printer grinds and repeats the error after a full check, stop and do not force it. Note the support code and look up your model on Canon PIXMA and MegaTank support for repair and service options. A technician can open the path safely without damaging rollers or sensors.
Conclusion
Clearing a G7020 rear tray jam takes patience: power off, pull slowly with both hands, check thoroughly for scraps, and test first with the front cassette. Load a small stack with guides touching lightly and matching settings, and most jams will not return.
Frequently Asked Questions
Should I pull jammed paper from the rear or the front output?
Pull from the rear if the jam is in the rear path, where the paper entered. Only pull from the front output if the sheet is already almost through and visible at the exit. Dragging a rear jam forward through the whole printer increases tearing and roller damage.
What if the paper tears and a piece stays inside?
Turn off and unplug again. Open the scanning unit, use a flashlight to find the piece in the rear slot, under the carriage, and at the output, and remove it gently with your fingers. Do not use sharp tools. If you cannot reach it safely, seek service rather than forcing it.
Why does my G7020 keep jamming in the rear tray with photo paper?
Photo paper is thicker and stiffer, so loading and settings matter more. Load one sheet at a time, set the exact photo paper type on the printer and in the print dialog, select Rear Tray as source, and keep guides light without bending the sheet. Store photo paper flat, as curled sheets jam far more often.
Can I clear a jam without turning the printer off?
No. Always turn it off and unplug first. Rollers and the carriage can move suddenly, and pulling paper while powered can damage the printer. Powering off correctly also parks the print head safely.
The jam is cleared but the error will not go away. What should I check?
Press OK to acknowledge the error, restart once more, and check again for a tiny scrap covering a sensor in the rear slot. Also clear the stuck job from your computer queue. If the printer says Ready but the computer still shows a jam, the computer is holding the old message.
Leave a Reply