
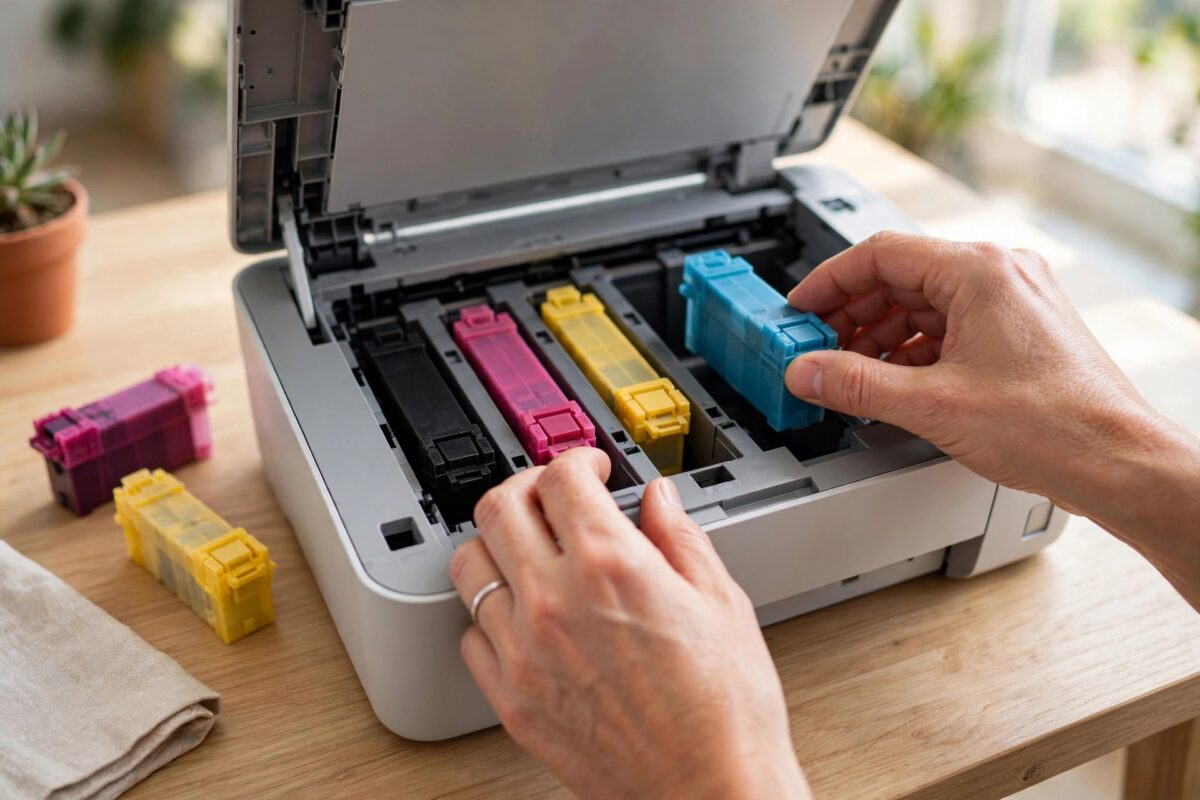
You have just fitted a fresh set of cartridges in your HP OfficeJet Pro 9015, closed the door, and instead of printing you get “Cartridge Problem” — one or more cartridges cannot be used until the device is enrolled in HP Instant Ink, or a cartridge is shown as missing or damaged. It is deeply frustrating with brand-new ink, but in most cases the cartridges themselves are fine. The usual causes are dirty contacts, a firmware setting blocking the cartridge type, or a printhead that needs a proper clean and reseat. This guide runs through the fixes in order.
Quick Answer
On the OfficeJet Pro 9015, a “Cartridge Problem” message with new cartridges is usually caused by dirty gold contacts, a cartridge not clicked fully home, or the HP+ / Instant Ink account requirement on that cartridge. Remove the cartridges, clean the contacts with a dry lint-free cloth, reseat them firmly, restart the printer, and check whether the cartridges are Instant Ink cartridges that need the printer connected to the internet and enrolled. Turn off Cartridge Protection in the printer settings if you use refilled or remanufactured ink.
First: Understand What the Message Means
The 9015 reads a small chip on each cartridge. The error appears when the printer cannot read that chip, or when the chip says the cartridge is not allowed. That gives three broad causes:
- Contact problems — ink, dust, or a protective film on the gold contacts stops the chip being read.
- Seating problems — the cartridge is in the slot but the latch is not fully engaged.
- Account problems — Instant Ink cartridges only work in the printer they were shipped for, while the printer is enrolled and online. HP+ printers also expect cartridges that meet HP’s requirements.
The printer usually names the problem cartridge on screen. Start with that one — but if the error appeared right after changing several cartridges, work through all of them.
Step 1: Reseat and Clean the Cartridges
- Leave the printer switched on — the carriage moves to the access position.
- Open the front door and the cartridge access door, and wait for the carriage to stop.
- Push each cartridge in and release it, then pull it straight out.
- Check the copper-coloured contacts on the cartridge and inside the carriage. If you see ink or residue, wipe gently with a dry, lint-free cloth or coffee filter. Do not touch the nozzle plate.
- Confirm the orange pull-tab and all protective tape were fully removed from new cartridges.
- Reinsert each cartridge into its colour-coded slot and push until it clicks firmly.
- Close the doors and watch the screen. Many printers then run an automatic alignment — let it finish.
Step 2: Restart and Update the Printer
With the printer on, unplug the power cable from the back, wait 60 seconds, and plug it back into a wall socket. This clears temporary cartridge-recognition errors. Then, on the printer’s screen, go to Setup, Printer Maintenance, Update the Printer, and let it check for firmware updates. HP regularly ships fixes for cartridge recognition in firmware, and the process follows the same pattern as HP’s official firmware update instructions.
Step 3: Check Instant Ink and Cartridge Protection
If you use Instant Ink cartridges, the printer must be connected to Wi-Fi and signed in to your HP account. A printer that lost its internet connection will reject Instant Ink cartridges even if they are genuine. Reconnect the printer to your network and confirm the Web Services status shows as connected.
If you use refilled or third-party cartridges and the error names one of them, the culprit may be Cartridge Protection, a feature that locks cartridges to one printer. Turn it off from the printer’s embedded web page (type the printer’s IP address into a browser, then Settings, Preferences, HP Cartridge Protection, Off) or in the HP Smart app under printer settings.
Step 4: Clean the Printhead Contacts
If one cartridge position always fails no matter which cartridge you fit, the printhead contacts in that slot are the problem. With the printer unplugged, gently wipe the contacts inside the carriage for that slot with a lint-free cloth lightly dampened with distilled water. Let it dry for ten minutes before refitting the cartridge. For deeper print quality issues after the error clears, see our guide to cleaning printer heads safely.
Common Mistakes to Avoid
- Forcing cartridges — they should click in with firm, even pressure. Forcing bends contacts and makes things worse.
- Cleaning contacts with tap water or tissues — minerals and fibres left behind cause repeat errors. Use distilled water and lint-free material.
- Mixing Instant Ink and retail cartridges without checking status — Instant Ink cartridges stop working if the subscription is cancelled, even with ink left.
- Updating firmware hoping it will accept third-party ink — some HP firmware updates tighten cartridge checks. If your non-HP cartridges work now, think before updating.
If the Error Names a Cartridge You Just Bought as Genuine
Occasionally a genuinely new HP cartridge triggers this message straight out of the box. Before returning it, check three things. First, the cartridge’s warranty date printed on its body — old stock that has sat in a hot warehouse can have a dried or faulty chip and dried ink at the nozzles. Second, that you bought the correct cartridge number for the 9015 in your region; HP uses different cartridge numbers in different parts of the world, and a cartridge bought abroad may be rejected by a printer set to another region. Third, try the cartridge after the printer has been fully power-cycled with the cartridge removed, so it is detected fresh. If a second new cartridge fails in the same slot while the others work, the slot’s contacts or the printhead are at fault, not the cartridges — and that distinction matters, because it decides whether you return ink to the shop or book the printer in for repair. Keep receipts and note which slot fails; HP support will ask exactly that question.
If you buy cartridges in multipacks, fit one new cartridge at a time and let the printer accept it before changing the next. Swapping all four at once makes it impossible to tell which cartridge the printer objects to when this message appears, and a one-at-a-time routine turns a guessing game into a thirty-second identification.
Conclusion
A “Cartridge Problem” message on the OfficeJet Pro 9015 with new ink is almost always a contact, seating, or account issue rather than faulty cartridges. Clean and reseat the cartridges, restart the printer, check your Instant Ink connection, and disable Cartridge Protection if you use refills. If a single slot still rejects every cartridge after cleaning, the printhead is the likely failure and HP support is the next call.
Frequently Asked Questions
Why does the error say my new cartridge is empty?
The printer estimates levels from the chip, not the ink. A refilled cartridge with an old chip may read empty. If it prints well, you can usually acknowledge the message and continue.
Can I use Instant Ink cartridges after cancelling my subscription?
No. Instant Ink cartridges are leased as part of the plan and stop working when the subscription ends. You will need retail cartridges.
The error names a cartridge I did not change. Why?
A neighbouring cartridge’s contacts or a smear inside the carriage can confuse the reader. Clean and reseat all four cartridges, not just the one you replaced.
Will resetting the printer clear the cartridge problem?
A power reset sometimes clears a false error. A full factory reset rarely helps cartridge recognition and wipes your network settings, so try the cleaning steps first.
My 9015 is an HP+ printer. Does that change anything?
HP+ activation requires the printer to stay connected to the internet and to use HP cartridges. If you declined HP+ at setup this does not apply, but an enrolled HP+ printer will block many third-party cartridges.
Leave a Reply