In Android development, encountering errors is inevitable, and one of the most common yet frustrating issues developers face is the “could not resolve com.android.tools.build:gradle:8.5.0” error. This guide will walk you through understanding why this happens and offer practical steps to troubleshoot and fix this error. By the end, you’ll have actionable solutions that are straightforward to implement, whether you’re a beginner or an experienced Android developer.
What Is the “Could Not Resolve com.android.tools.build:gradle:8.5.0” Error?
When building an Android project in Android Studio, the Gradle build system automates much of the project compilation, testing, and packaging. To manage the build, Android Studio relies on Gradle plugins, specifically the com.android.tools.build plugin, which includes configurations, libraries, and tools necessary to compile and package the project.
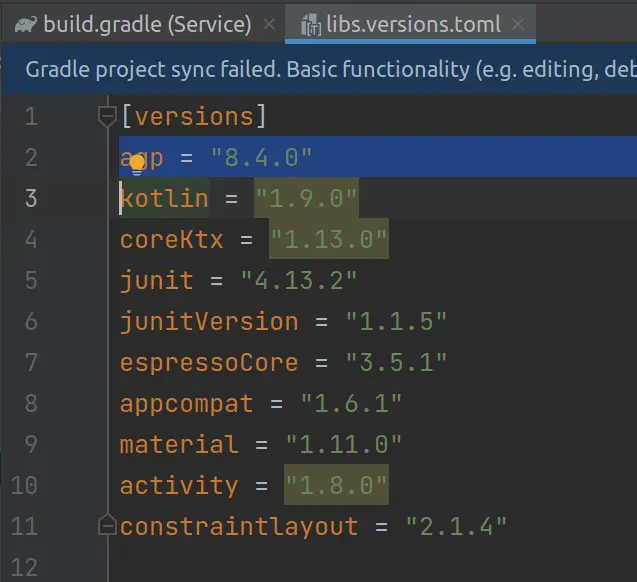
If you’re seeing the “Could Not Resolve com.android.tools.build:gradle:8.5.0” error, it means that Gradle cannot locate this specific version (8.5.0) of the com.android.tools.build plugin in its repositories, which prevents the build process from proceeding.
Common scenarios where this error arises:
- After updating Android Studio or Gradle.
- When switching between projects that use different Gradle versions.
- If working offline or with restricted internet access.

Understanding the Cause of the Error
The Gradle system relies on specific plugins and libraries to build Android apps. Here’s why you might encounter this error:
- Version Conflicts: If you recently updated Android Studio, the project may still rely on an outdated Gradle plugin version. Alternatively, your project may specify a version (8.5.0) that is too new or hasn’t yet been released.
- Dependency Issues: Gradle plugins and dependencies are often hosted on repositories like Maven Central or Google’s Maven repository. If these repositories are not properly referenced in your build file, or if there’s a network issue, Gradle won’t find the necessary resources.
- Network Restrictions: If working on a corporate network, firewall restrictions may prevent Gradle from accessing the required repositories.
Understanding the root cause is crucial, as it will help you apply the most effective solution without unnecessary steps.
Step-by-Step Troubleshooting Guide
Now that we’ve examined the potential causes, let’s go through a series of steps to resolve this issue.
Step 1: Verify Internet Connectivity
Since Gradle relies on online repositories to fetch dependencies, ensure you have a stable internet connection. Restarting Android Studio or switching to a different network may also help if connectivity is unstable.
Step 2: Check Version Compatibility
Make sure your Android Studio version supports the Gradle plugin version 8.5.0. Sometimes the IDE may lag behind or not fully support the latest plugin versions.
- Go to File > Project Structure > Project in Android Studio.
- Check the Gradle Version and Android Plugin Version.
- Confirm that these versions are compatible. The official Android Gradle Plugin Release Notes is a useful resource to cross-check supported versions.
Step 3: Update Gradle Plugin Version
If version 8.5.0 isn’t available or compatible, you may need to update the Gradle plugin to the latest stable version.
In the build.gradle (Project) file, locate the line:
gradle
Copy code
classpath ‘com.android.tools.build:gradle:8.5.0’
- Replace 8.5.0 with a compatible version (e.g., 8.2.1 if 8.5.0 is unavailable).
- Sync your project by clicking Sync Now in the notification bar at the top.
Alternatively, if you want to use the latest Gradle version, replace 8.5.0 with the latest stable version available from the Gradle Release Notes.
Step 4: Manually Sync Gradle Files
After updating dependencies or modifying your build file, you may need to force Gradle to re-sync and fetch the updated versions.
- In Android Studio, go to File > Sync Project with Gradle Files.
- Wait for the sync process to complete and check for errors.
Step 5: Clear Gradle Cache
Clearing the Gradle cache can sometimes resolve issues caused by corrupted or outdated files.
- Navigate to File > Invalidate Caches / Restart in Android Studio.
- Select Invalidate and Restart. This will clear the IDE cache, including Gradle’s.
- Once Android Studio restarts, Gradle will re-download dependencies. Ensure you have a stable internet connection for this.
gradle
Copy code
# Clear Gradle Cache via Terminal (Alternative)
# Execute this in the project’s terminal or command prompt.
./gradlew clean

Common Mistakes and Misconfigurations to Avoid
Even with troubleshooting could not resolve com.android.tools.build:gradle:8.5.0, some common mistakes can cause the error to reoccur. Here are a few things to watch for:
- Incorrect Gradle Path: Ensure classpath ‘com.android.tools.build:gradle:X.X.X’ in your build.gradle file matches the recommended version for your Android Studio installation.
- Repository Misconfiguration: Both jcenter() and mavenCentral() are deprecated or less commonly used now. Use google() and mavenCentral() instead.
- Offline Work Mode: Check that Android Studio isn’t set to offline mode, which can prevent Gradle from fetching necessary files.
Advanced Solutions and Alternate Workarounds
In some cases, you may need to try alternate solutions:
- Downgrade Gradle Version: If you’re unable to use 8.5.0, try a stable lower version. Edit classpath ‘com.android.tools.build:gradle:8.5.0’ to a stable one (like 7.2.0).
Use Command-Line Sync: Syncing from the command line bypasses the IDE, allowing a more controlled process.
bash
Copy code
./gradlew build
Additional Resources
For more in-depth information, consult these resources:
- Official Gradle Documentation – To learn more about Gradle configurations.
- Android Developers Blog – Stay updated with Android-related announcements and updates.
- Stack Overflow – Community-driven solutions for specific issues.
Conclusion
Resolving the “Could Not Resolve com.android.tools.build:gradle:8.5.0” error in Android Studio can be straightforward when you understand the underlying causes and approach the solution systematically. This error usually stems from version mismatches, missing dependencies, or network issues, all of which can be managed with careful adjustments to your Gradle files, proper syncing, and occasional cache clearing. By following this troubleshooting guide, you can not only fix the error but also gain a better understanding of how Gradle integrates into Android Studio, ultimately building a smoother development workflow. Remember to regularly check compatibility between Android Studio and Gradle plugin versions and stay updated on best practices from the Android developer community. With these insights and resources, you’re well-equipped to handle this and similar Gradle issues confidently in the future.
